Connecting Gutters In Revit
Revitcity Com Connecting Gutters

Gutters With Slope Autodesk Community
Solved Model Roof Gutter Autodesk Community Revit Products

Gutter End Caps In Revit Architecture Youtube

Revit Families Series Custom Gutter Profile A How To Guide Youtube

Work With Gutters Revit Products 2016 Autodesk Knowledge Network
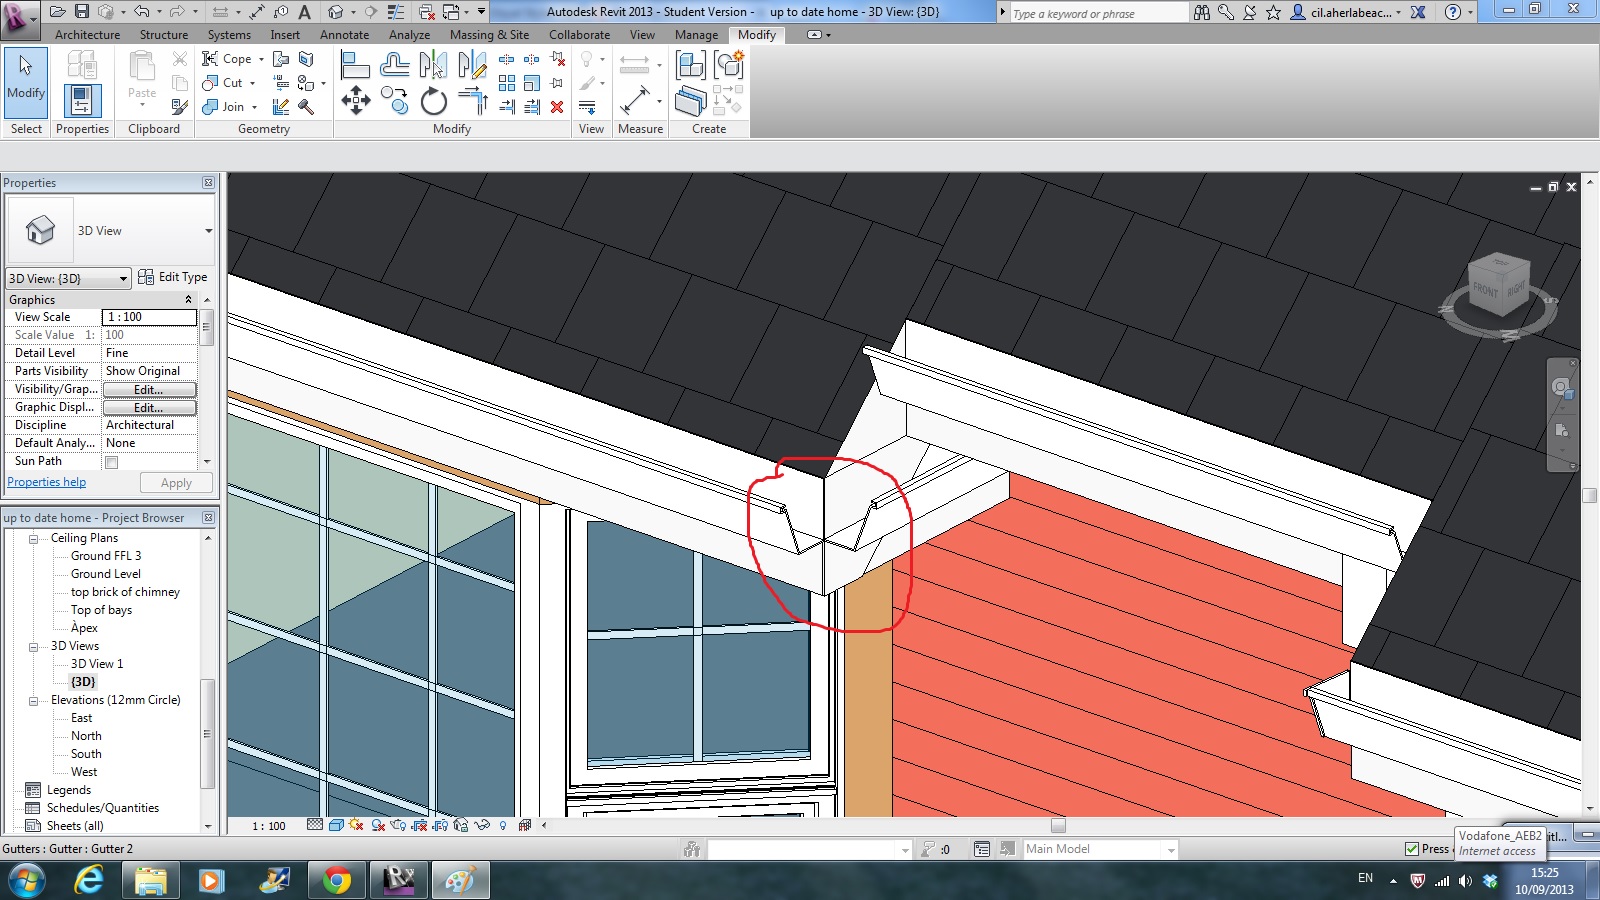
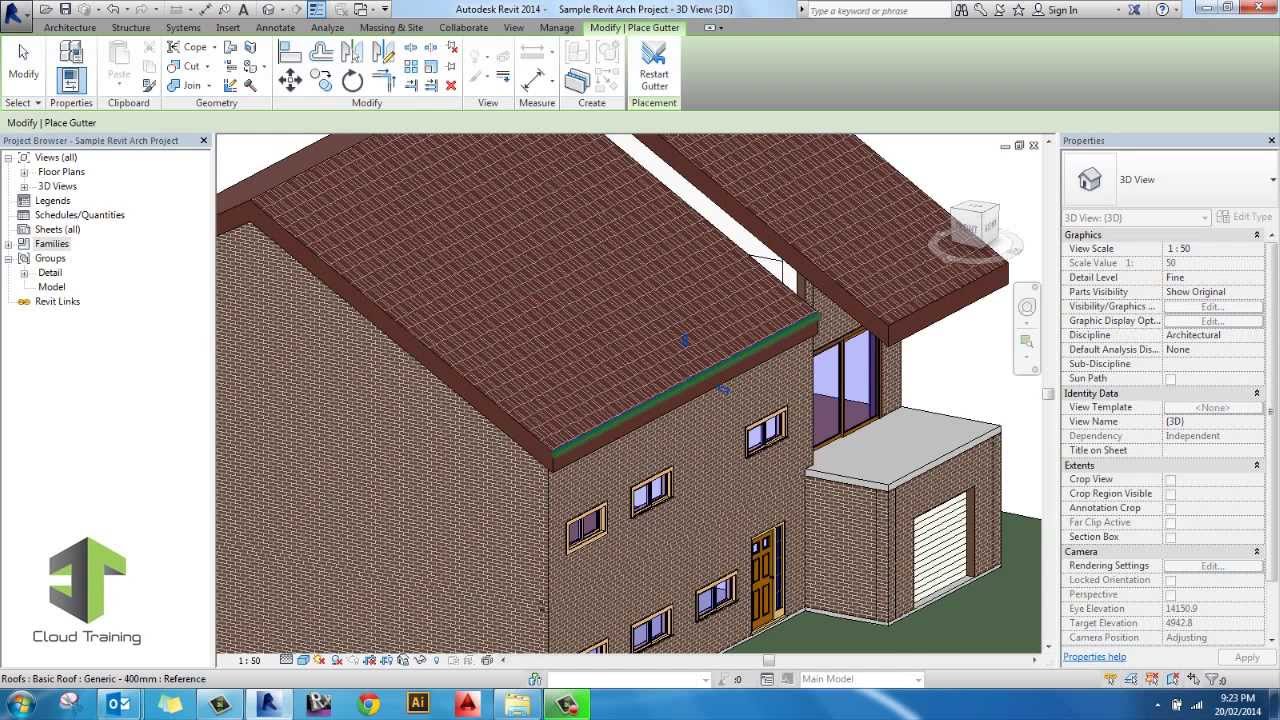
Work with gutters after adding a gutter you can add and remove segments flip its orientation and resize the gutter.
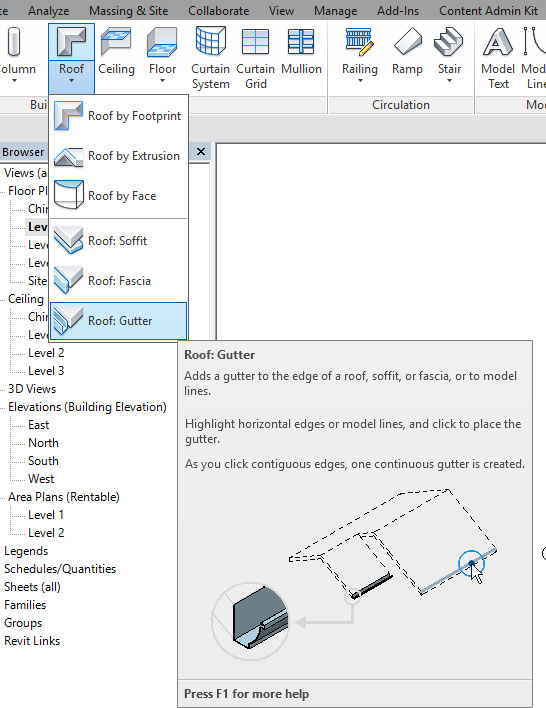
Connecting gutters in revit. Because of the high quality steel it will age in the same way as all the other products in the system and no difference in design will occur. As you click edges revit treats this as one continuous gutter. Set them very close to the place you are wanting them to be inserted into. Click architecture tabbuild panelroof drop down roof.
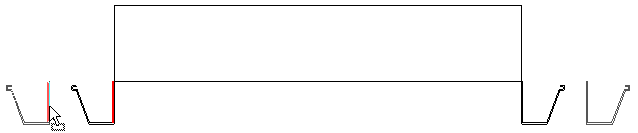
When you press tab revit cycles through available selections and then highlights the chain of edges. Absolutely no need for silicon or other sealant. Move a gutter you can change the horizontal or vertical offset of a gutter through its properties or by graphically moving the gutter. After you have measured the rivets and chosen your drill bit to use don t start drilling quite yet.
Watch the status bar for information about valid references. Silicon will dry and will not be tight against the surface of the gutter and there s a risk it will leak. The gutter joint creates a firm and durable installation with its perfect fit and snap on function to the half round gutter. Click to place gutters around the edge of the building.
You will first want to lay out your rivets onto the gutters. The gutter system contains all necessary products like gutter stop ends and inner and outer angle profiles. Only the chain of edges can be selected for the roof. Highlight horizontal edges of roofs soffits fascias or model lines and click to place the gutter.
Now you can start to drill the holes for your rivets. The chain of edges for the fascia will not highlight.

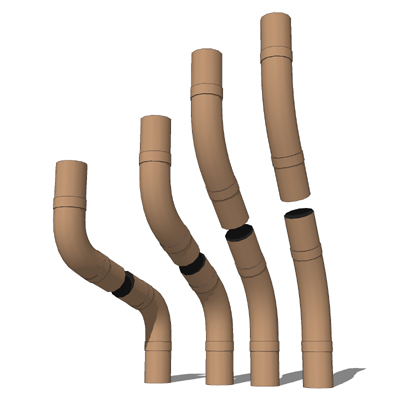
3 04 Down Pipes Youtube

Add A Gutter Revit Products 2019 Autodesk Knowledge Network

Roof Soffits Facias And Gutters In Revit Youtube

Roofs In Revit 8020 Bim

Gutter Downspout In Revit Tutorial Youtube

Gutters Revit Products 2019 Autodesk Knowledge Network
Interior Gutter And Wooden Roof

Create 8020 Bim
Gutters
Revitcity Com Gutter But What About Gutter Downpipe
7 Inch Box Gutter Drexel Metals Inc Free Bim Object For Revit Bimobject

How To Add Roof Truss Underneath Roof In Revit Youtube

Wall Floor Connection In Revit Tutorial Youtube

Revit Families Series Custom Gutter Profile How To Revit Products Autodesk Knowledge Network
Video Create A Dormer Revit Products 2019 Autodesk Knowledge Network

Solved How To Place A Gutter On A Sloping Roof Edge Autodesk Community Revit Products

Structural Steel Connections In Revit 2017 And Advance Steel 2017 Canopy Meaning Portable Gazebo Beams

Solved Downspouts Autodesk Community Revit Products
Https Encrypted Tbn0 Gstatic Com Images Q Tbn 3aand9gcqor2isbxwlbhwpl3uftobkksbmzfomx Aabdptf0 9yvkdig2p Usqp Cau

How To Model A Gutter On A Sloping Roof Edge Revit
Rectangular Gutter System 140 Lindab Free Bim Object For Revit Revit Revit Revit Bimobject

About Streets And Sidewalks Revit Products 2019 Autodesk Knowledge Network
Nvent Raychem Icestop Heating Cable For Roof Gutter Deicing North America Nvent Free Bim Object For Revit Revit Revit Revit Revit Revit Revit Revit Revit Bimobject
Rectangular Gutter 140 Lindab Free Bim Object For Revit Bimobject

Work With Fascia Revit Products 2018 Autodesk Knowledge Network

Flat Roofs In Revit Tutorial Youtube
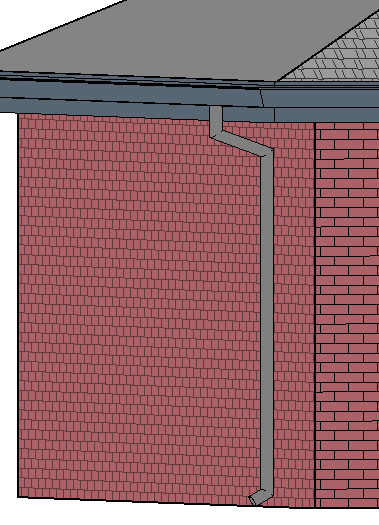
How About A Downspout For That Roof

Autodesk Revit Architecture Left Panel And Graphisoft Archicad Right Download Scientific Diagram
Revit Tutorials Custom Wall Parapet Youtube
Half Round Gutter System 100 Lindab Free Bim Object For Revit Revit Revit Revit Bimobject
Gutter And Downspouts Scuppers And Collector Boxes Metal Era Free Bim Object For Revit Bimobject
Move A Gutter Revit Products 2018 Autodesk Knowledge Network
Video Add Fascia Revit Lt 2019 Autodesk Knowledge Network
Round Downpipe System 87 For Half Round Gutter 150 Lindab Free Bim Object For Revit Revit Revit Revit Bimobject

Revit 2019 Ceilings And Roofs Episode 3 Slope Arrow And Joining Roofs Youtube
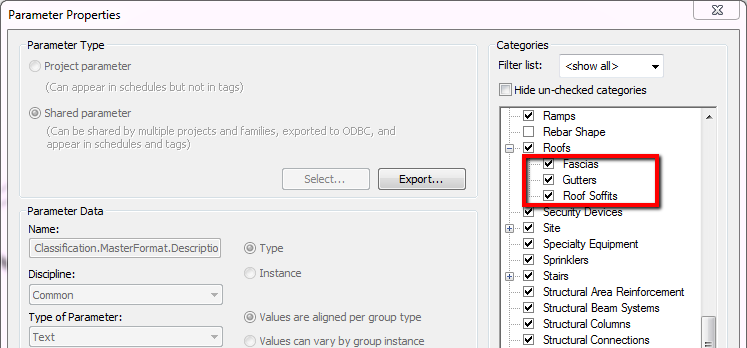
Revit Parameters From Classification Manager Are Not Added To Subcategories Revit Products Autodesk Knowledge Network
Adjustable Fascia Bracket For Half Round Gutter 150 Lindab Free Bim Object For Revit Revit Revit Bimobject
Round Downpipe System 100 For Rectangular Gutter 140 Lindab Free Bim Object For Revit Revit Revit Revit Bimobject

Pin On Material And Systems

Revit Detail 07 05 Sun Shade Roof Patio Inner Gutter Detail
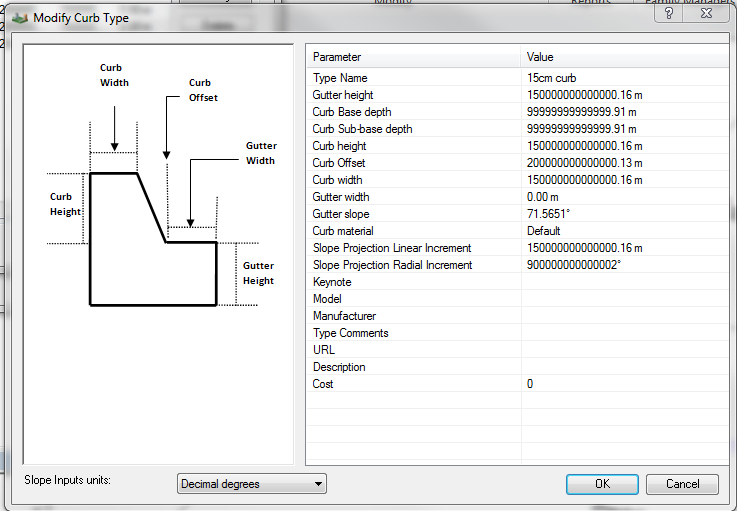
Unexpectedly Large Values For Parameters In New Or Modified Curb Family Type In Site Designer For Revit Revit Products 2018 Autodesk Knowledge Network

Fascias And Gutters Wont Join On Separate Roofs Created By Slope Arrows Autodesk Community Revit Products

Revit Tutorials 8020 Bim

